 It is easy for attorneys to get lost in managing all of the emails they receive today. For example, it may sound all too familiar to come into the office, open your inbox, and 4 hours later realize that you have just spent their whole morning organizing and responding to emails. Although we wish emails would just answer themselves sometimes, that isn’t realistic. The best approach, especially for solo attorneys, is to make sure your inbox is organized so it is easy for you to follow up with the most important emails first.
Rules in Microsoft Outlook are a great way to manage your email. Instead of repeatedly doing the same manual task like moving email from a specific person to a specified folder, the rules you create in Outlook will push certain messages to folders automatically. You can set rules based on a wide range of conditions including a person’s name, words in the subject line or body of the message, date range, etc.
We are going to review 4 ways to create a rule.
The easiest rule to create
The easiest rule to create is to have all email that comes from a specific person automatically moved to a specified folder. To do this:
- In the Inbox, select an email from a person that you want sent to a specified folder.
- On the Home Ribbon, click the Rules button. A drop down menu appears – select “Always Move Messages from …”
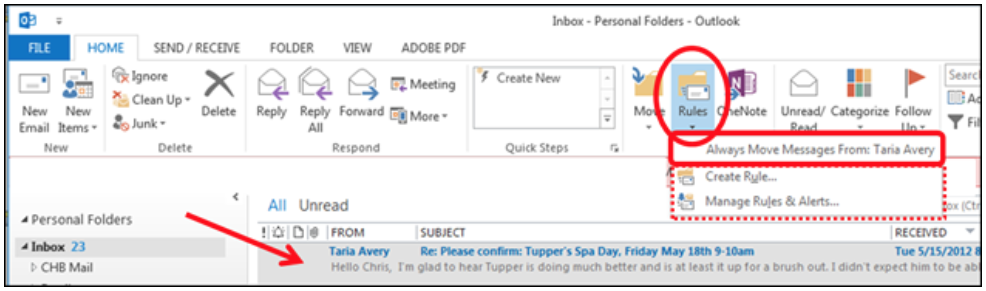
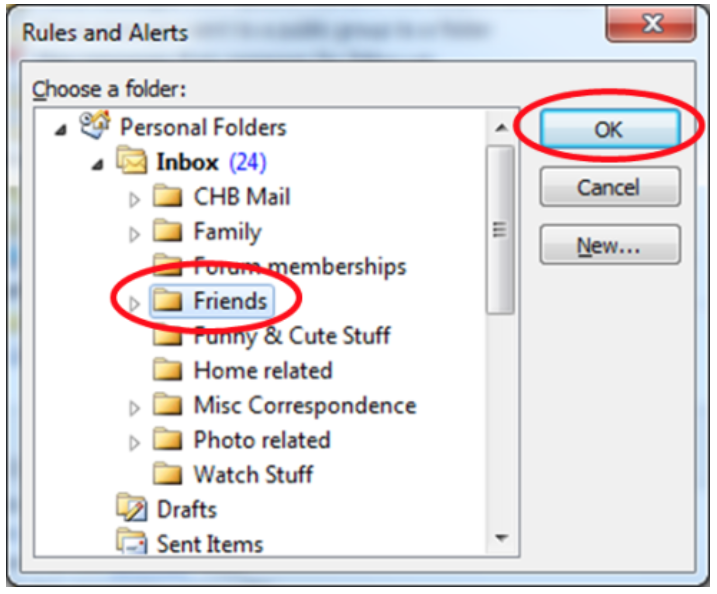
- Choose the appropriate folder.
- Click OK
Create other rules based on the content of an email:
- In the Inbox, select an email from a person that you want sent to a specified folder.
- On the Home Ribbon, click the Rules button.
- A drop down menu appears – select “Create Rule”
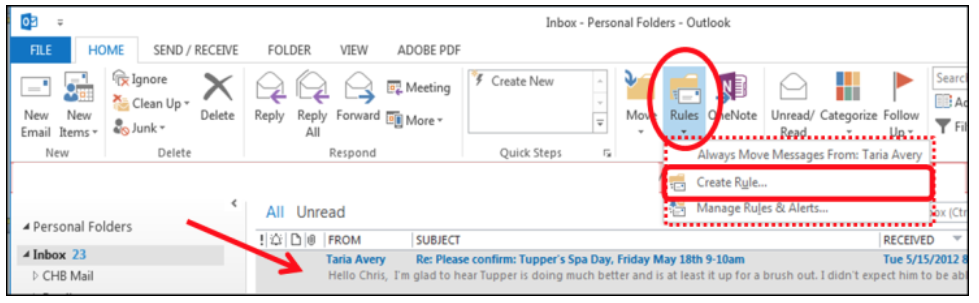
- In this dialog box you can select other conditions and actions.

Create rules from available templates:
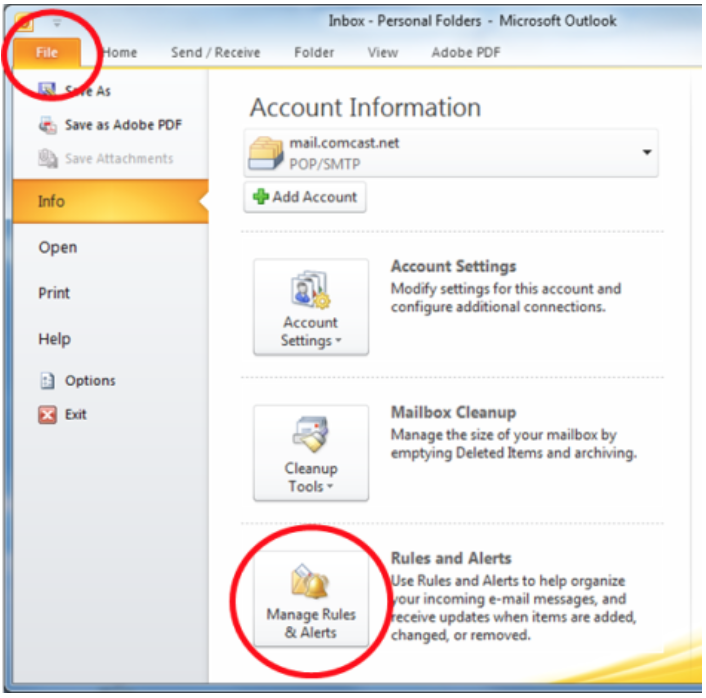
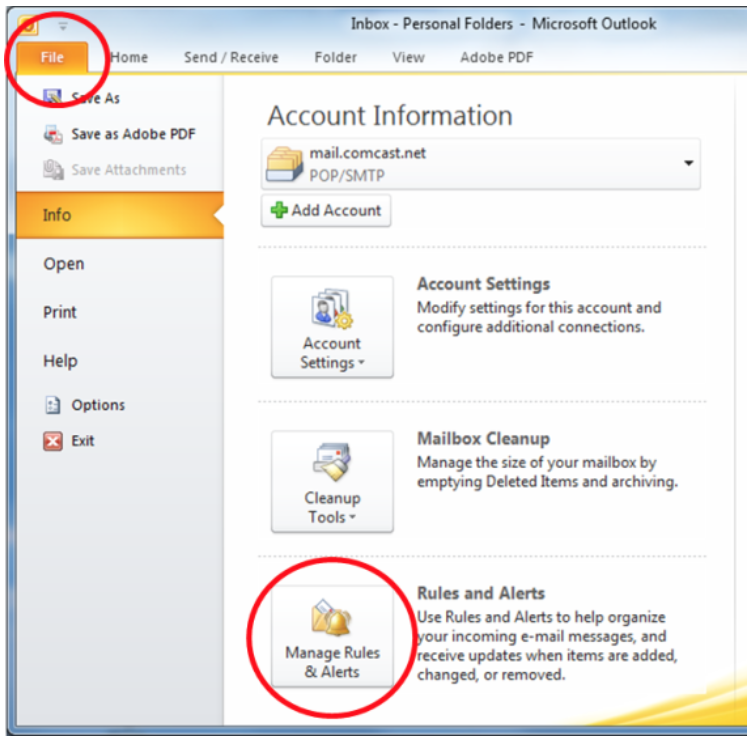
- Click on the “File” tab
- Click on “Manage Rule and Alerts”
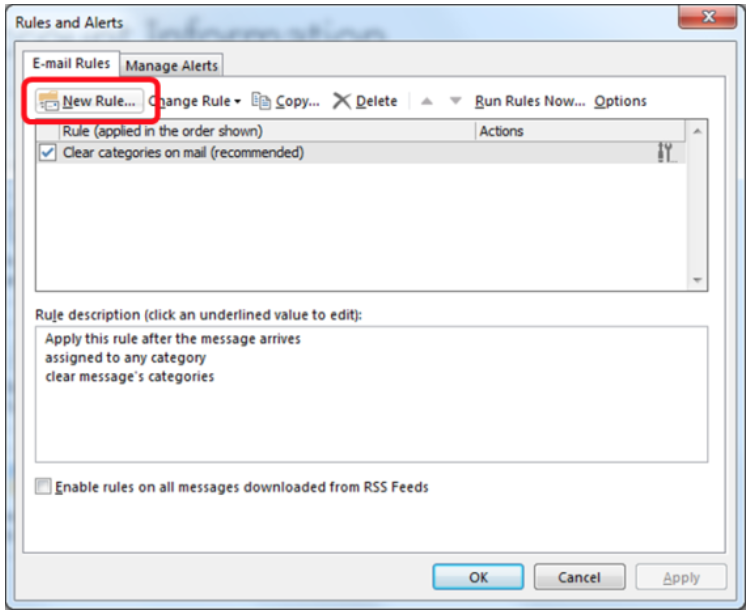
- Click on “New Rule”
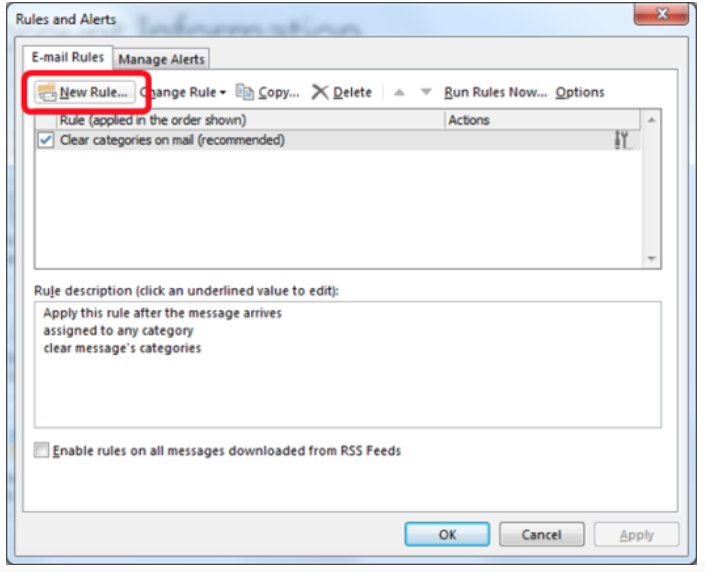
- The Rules Wizard dialog box will open.
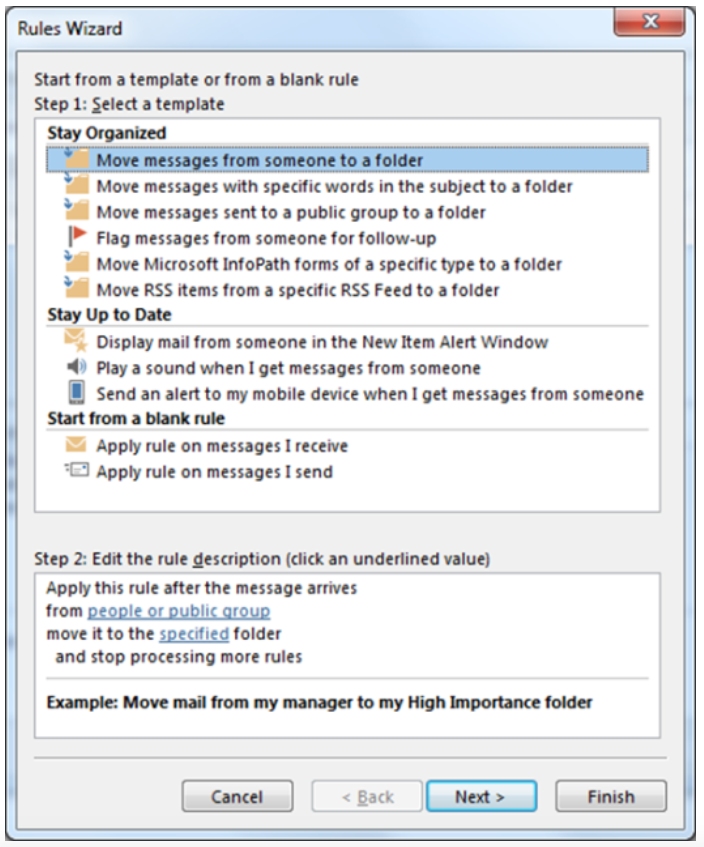
- In Step 1 you can select a template or you can start from a blank rule.
- When starting from a blank rule you can create rules to be applied on messages you receive or on messages you send.
- If you select a template, Step 2 allows you to define the specific condition to be applied and action to be taken.
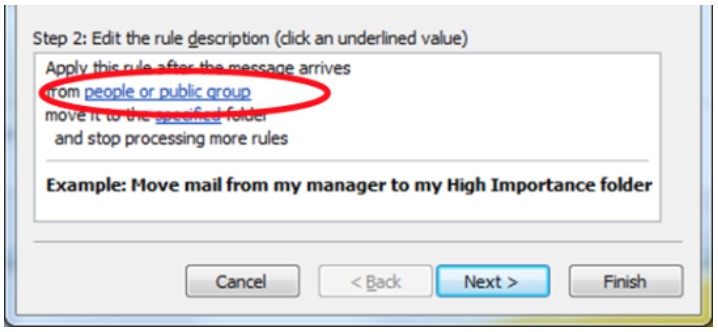
- In Step 2
- Click on “people or public group”. Your address book will open. Double-click on the name of the person or group.
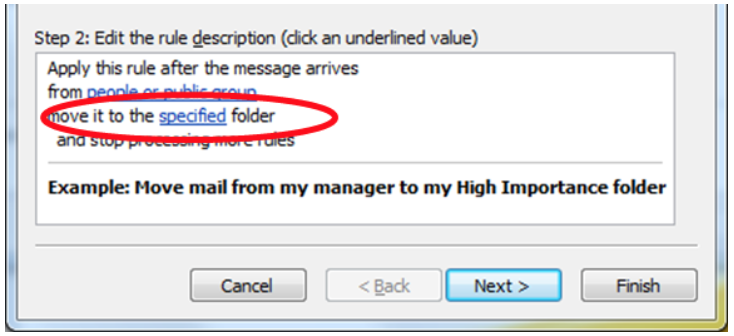
- Click on “specified”. Your folder list will open. Select the folder and click OK.
- Click Finish
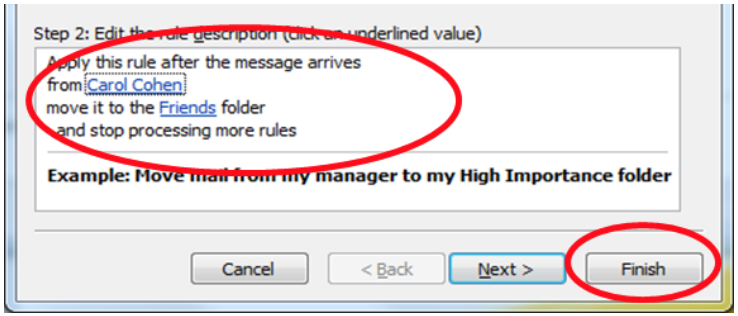
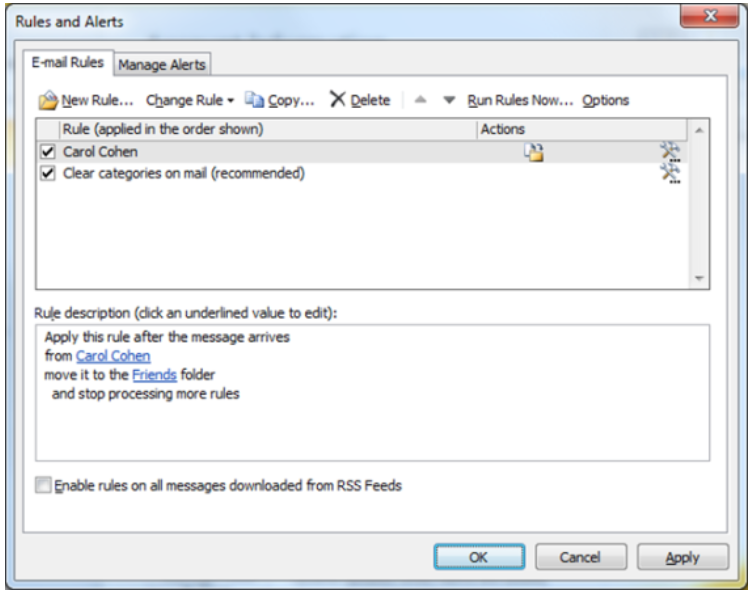
- The new rule will be in your list of rules.
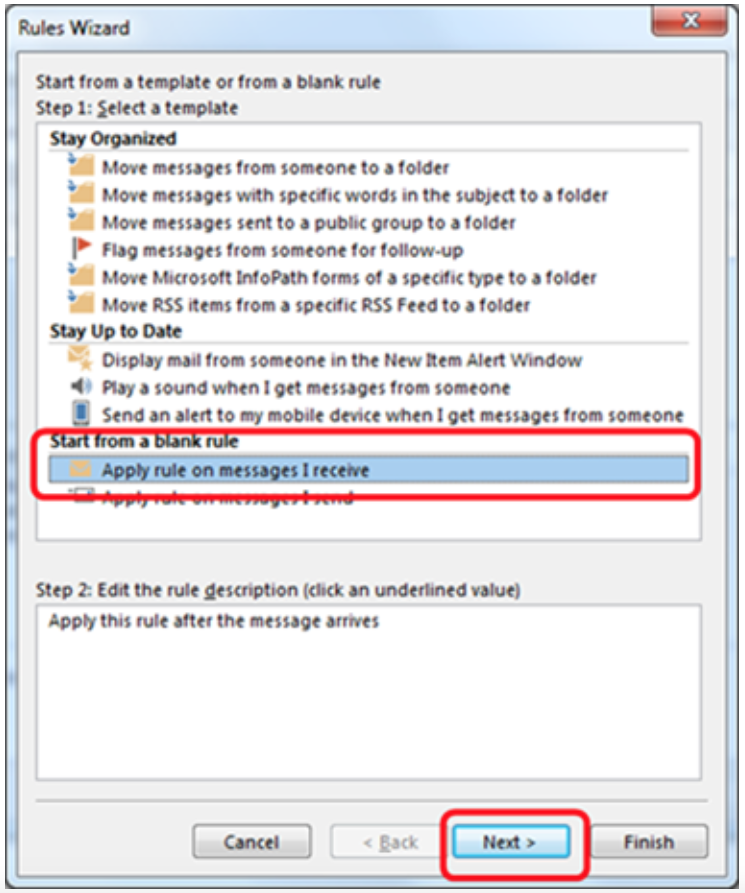
Create rules from scratch. This will give you the most flexibility.
- Click on the “File” tab
- Click on “Manage Rule and Alerts”
- Click on “New Rule”
- Select “Apply rule on messages I receive”. Note: You can apply rules to messages that you send.
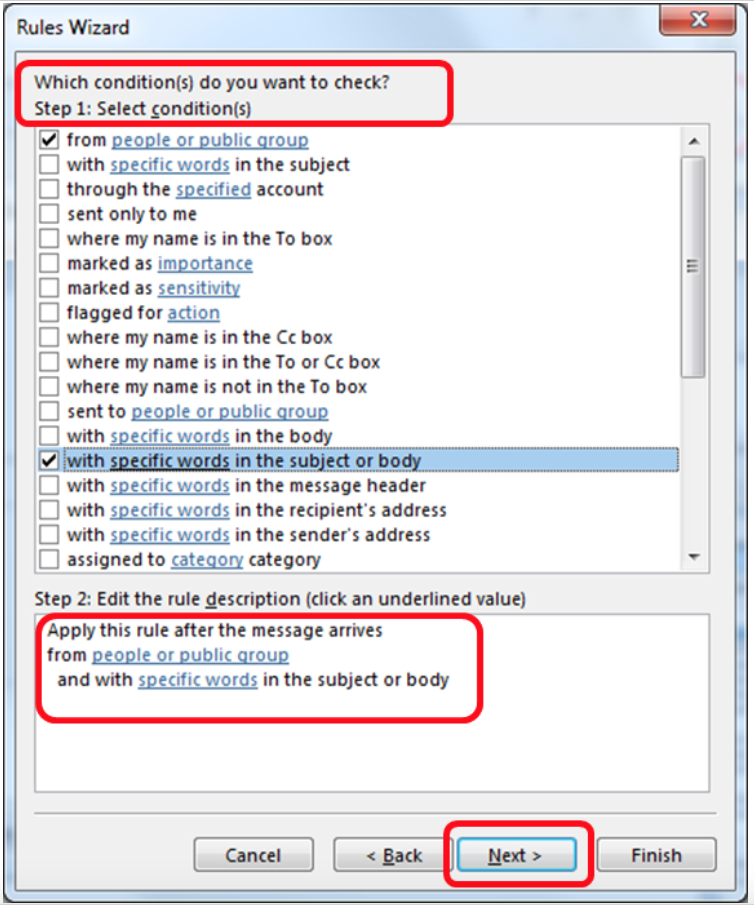
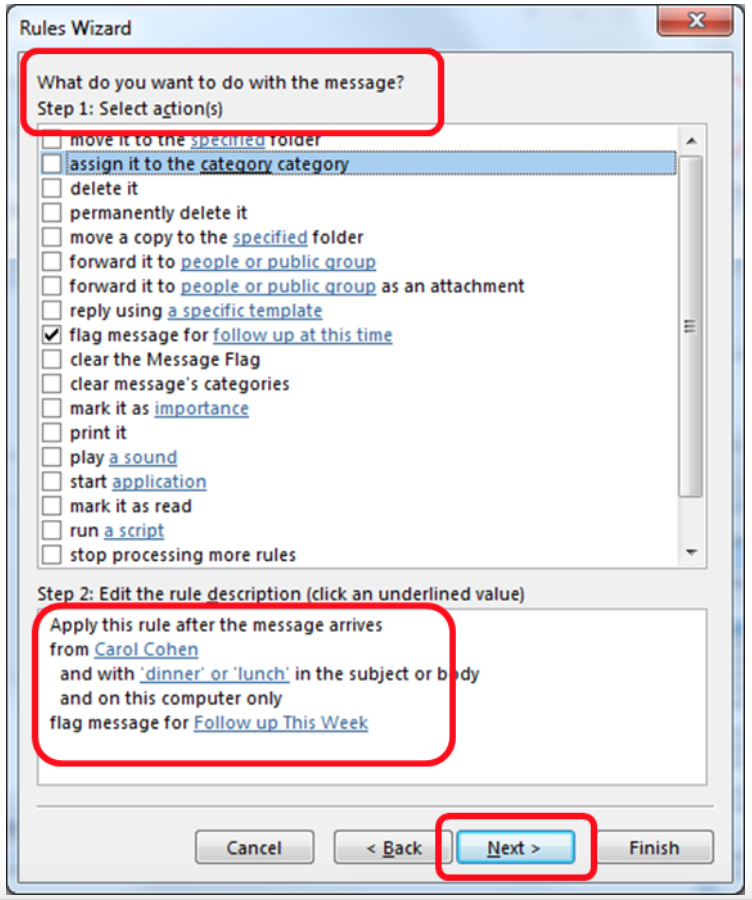
- Step 1: Select the condition or conditions you want to check. You have lots of options here. For this example, I selected “from people or public group” and “with specific words in the subject or body”. Notice the rule description in Step 2.
- Click “Next”
- Step 2: Click on “people or public group”. Your address book will open. Double-click on the name of the person or group.

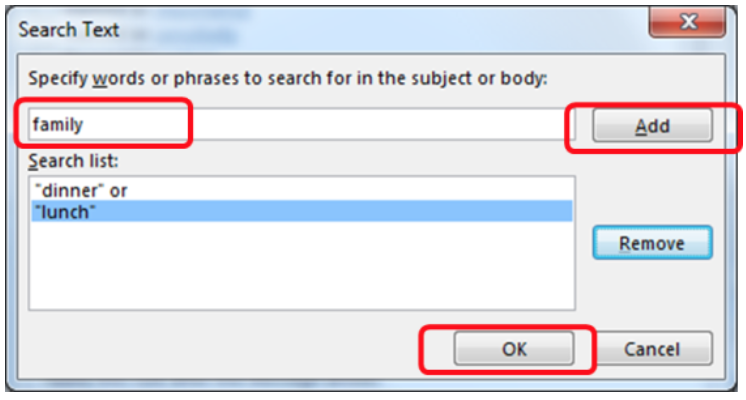
- Click on “specific words”

- In the dialog box type the specific words or phrases to search for in the subject or body.
- Click Add after each word or phrase
- Click OK
- You can now see the edited rule. Click “Next”

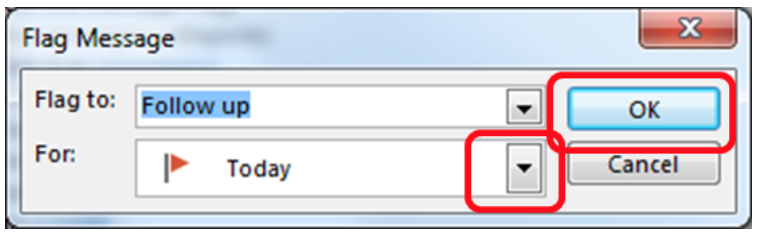
- Identify what you want to do with the message. In this example, we are going to follow up at a specific time. Note the addition to the rule.
- Click on “follow up at this time”
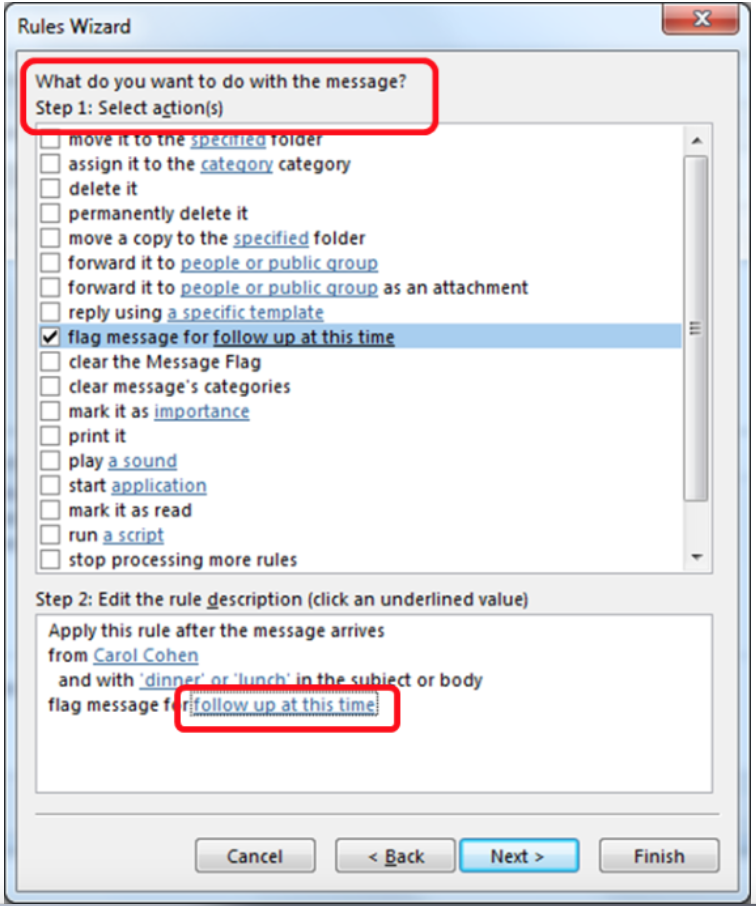
- Click the drop-down arrow to select when you want to follow up
- Click OK
- This is the completed rule. Click Next
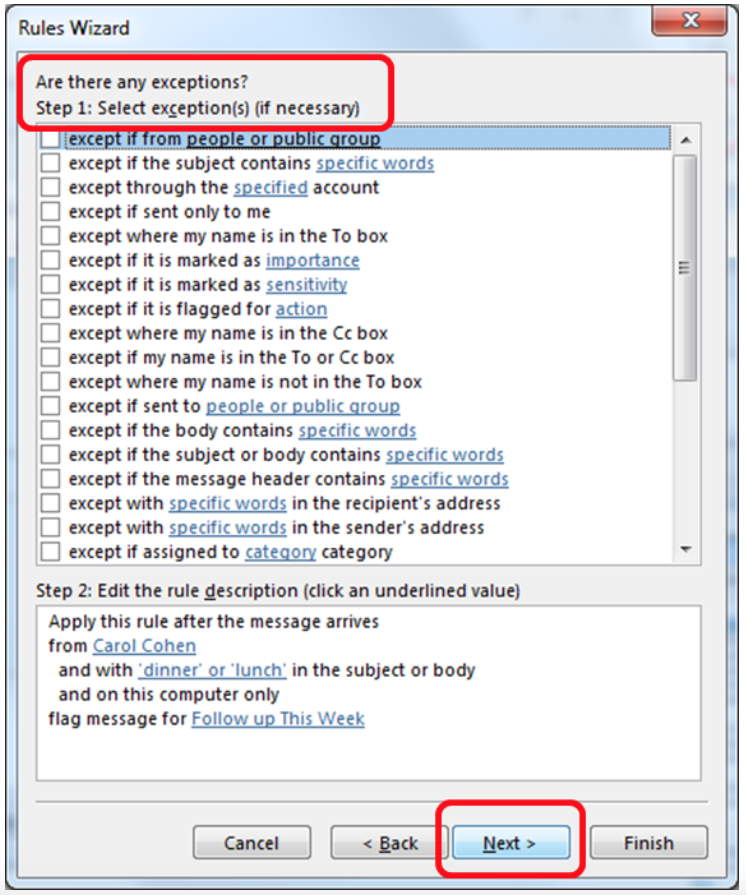
- Rarely, if ever, will you find an exception to the rule. If you do, be sure to select it. Click “Next”.
- Give the rule a name.
- Click both “Run this rule now on messages already in Inbox” and “Turn on this rule”
- Click “Finish”
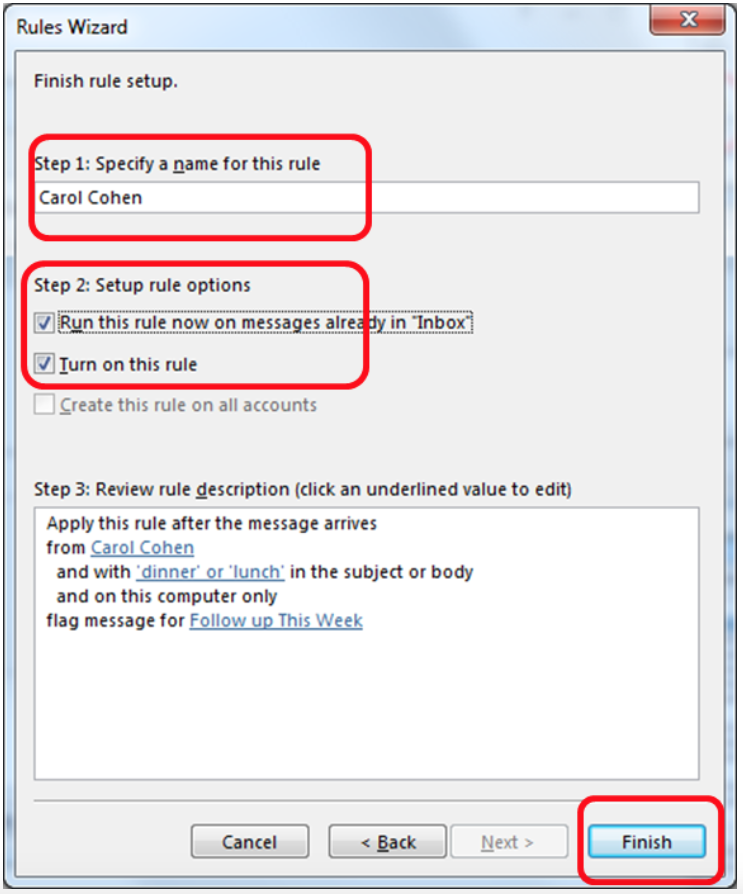
- You will see the rule in your list. Click Apply

All opinions, advice, and experiences of guest bloggers/columnists are those of the author and do not necessarily reflect the opinions, practices or experiences of Solo Practice University®.


Thanks for this post. But what i’d REALLY like to know is, is there a way to create a rule that associates a reply to an email with the original email, such that when you put either the original or your reply into a folder, the associated email (the reply or the original) will automatically be moved to the same folder.
Hi Glenn!
This is a trickier task. You can create rules based on contacts, sent mail or recipients. However, there is not a good way to handle “conversations.”
There are only a few tools that will manage email in that way. Specifically, Smokeball does a phenomenal job of automatically filing your Outlook conversations, replies and attachments with our email management tools. You can check those out here, and SPU students and alumni receive a discount.
http://www.smokeball.com/case-management-software/email-management/